To prepare for an online hand analysis, take photos of your hands and fingerprints. Here you will find detailed instructions on how to proceed.
Important: Please take all photos in good light and with flash so that the fine lines are clearly visible. For each picture, make sure that the focus is on the hand or fingerprints. For better focus, keep the hand as far away from a background as possible. Send me the pictures uncompressed in high resolution.
Please send the images at least two days before your hand analysis to jo@handguide.me, so that I can ask you for more pictures if I cannot recognize certain aspects.
Schedule your hand analysis appointment so that you don’t have any other appointments or commitments afterwards. This way you can take your time integrating the experience.

For a hand analysis I need the following pictures:
1. Your complete hand inside left and right (2 pictures). Please photograph the hand at a straight angle from above, so that the proportions are not distorted:

2. Close-ups of your palm or lower hand area (2 pictures):

3. Close-ups or uppermost limbs of all ten fingers for fingerprint identification (6 to 10 images). Make sure that the complete top finger limb is pictured, from the last joint to the tip of the finger.

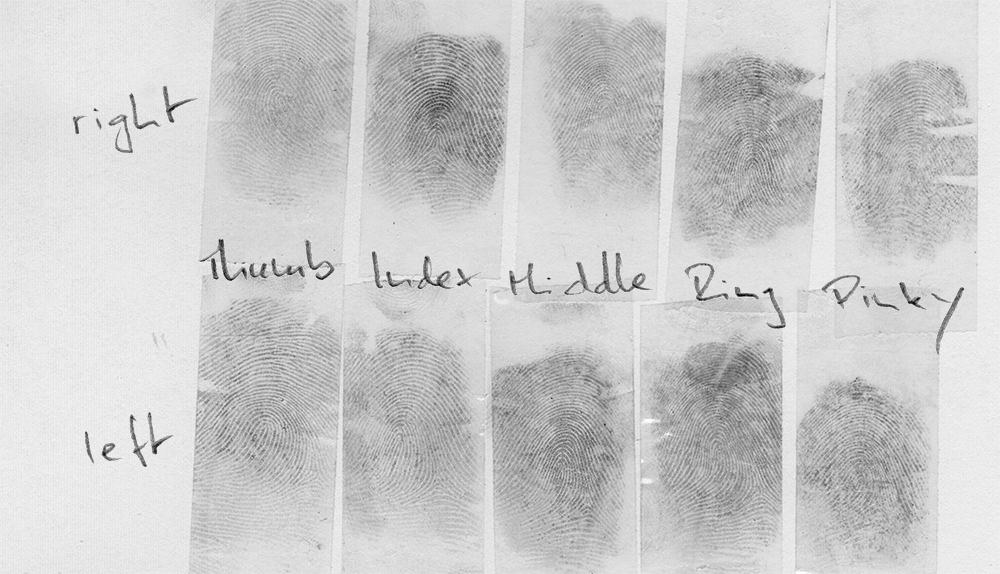
Alternative: If the fingerprints are not visible in the photos, you can image them using this method:
You will need a soft pencil, a sheet of paper and transparent tape.

1. Draw a saturated area on a sheet of paper with a soft pencil.
2. Roll your upper finger limb on the pencil surface. Make sure the whole finger limb is full of color.
3. Attach a piece of tape to the top phalanx, peel it off, and tape it to a white piece of paper.
4. Repeat this process with all ten fingers and label each print so that it is easy to see which finger it belongs to. Then you can scan or photograph the prints.
